
Drypoint on Plexiglass
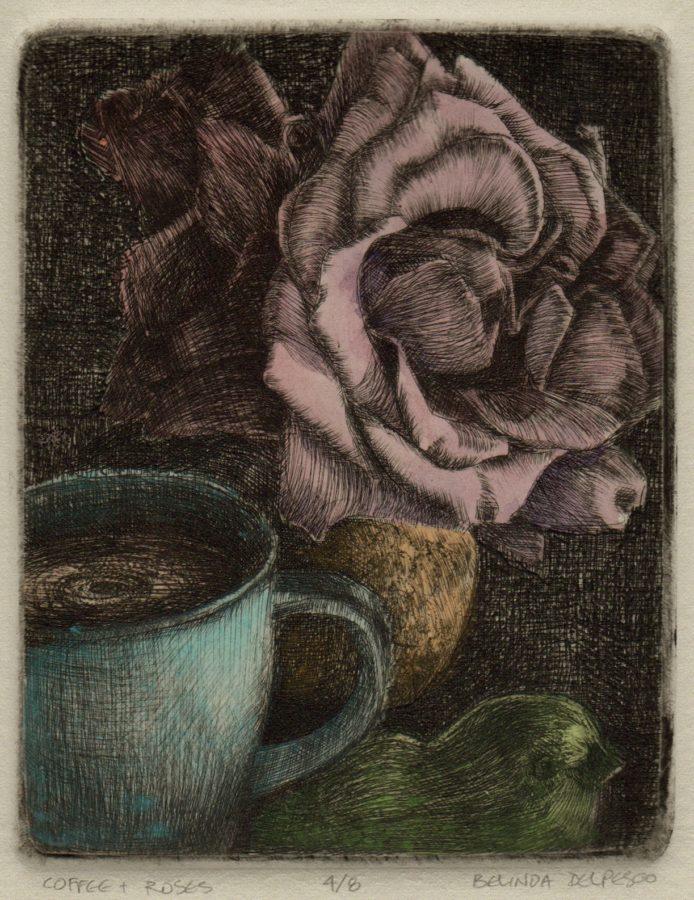
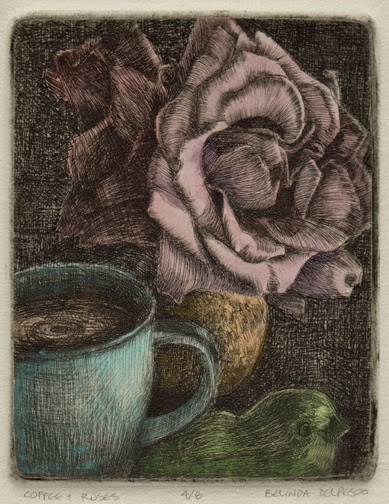
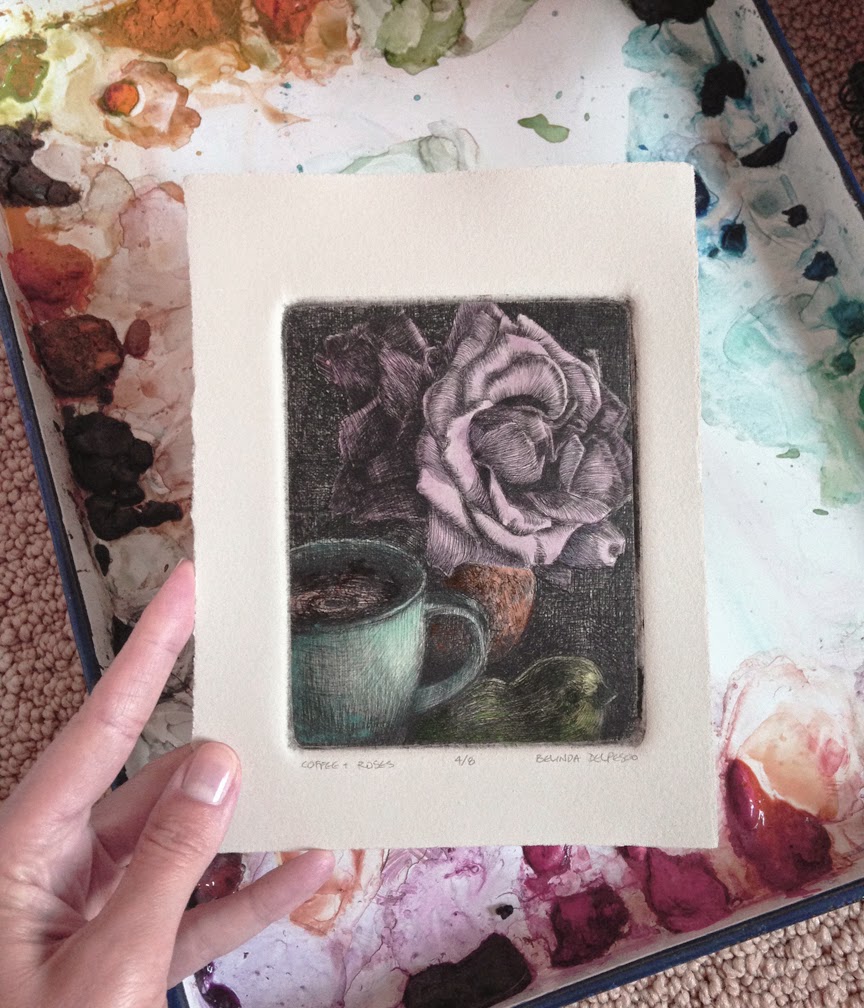
Want to know how to make a drypoint on plexiglass? This little drypoint print (above) was an experiment with inexpensive plastic plate material, instead of the traditional copper plates used in drypoint printmaking.
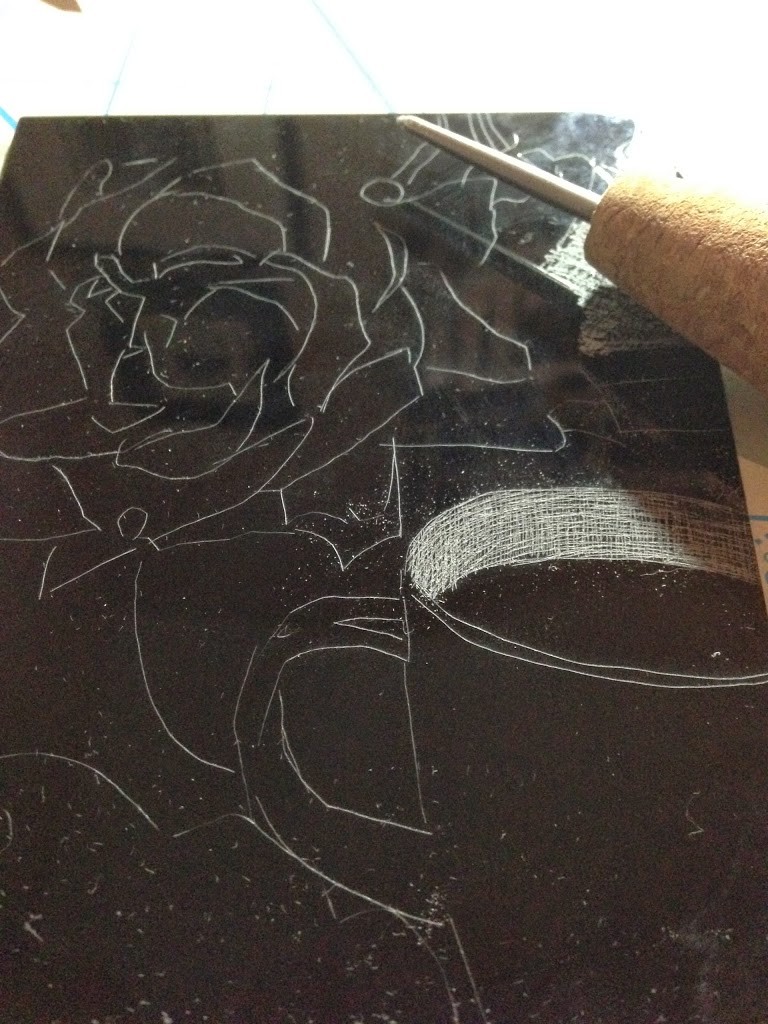
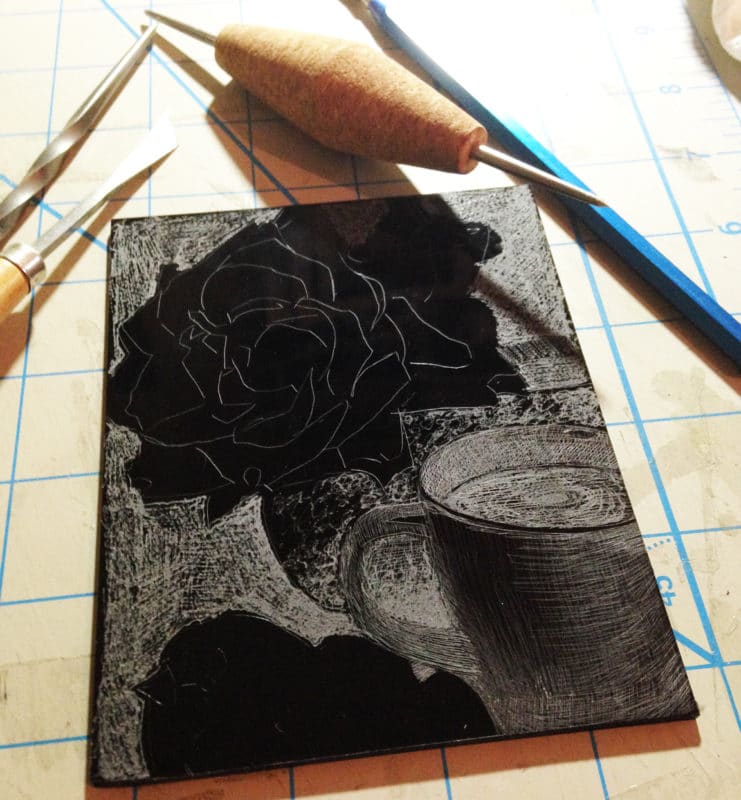
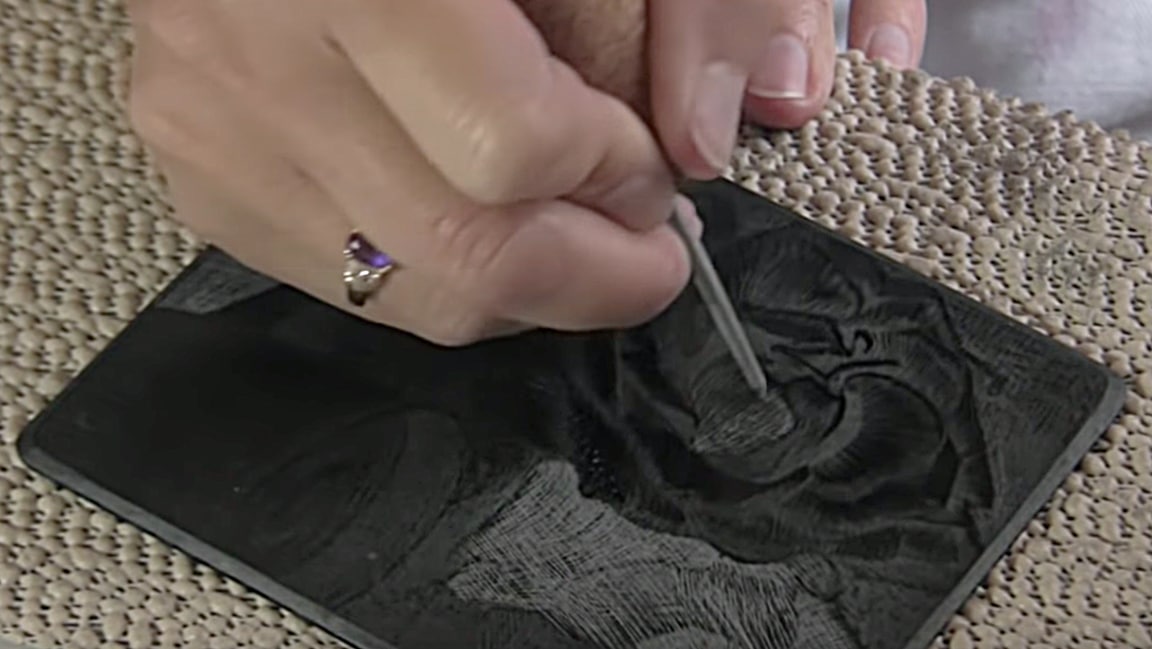
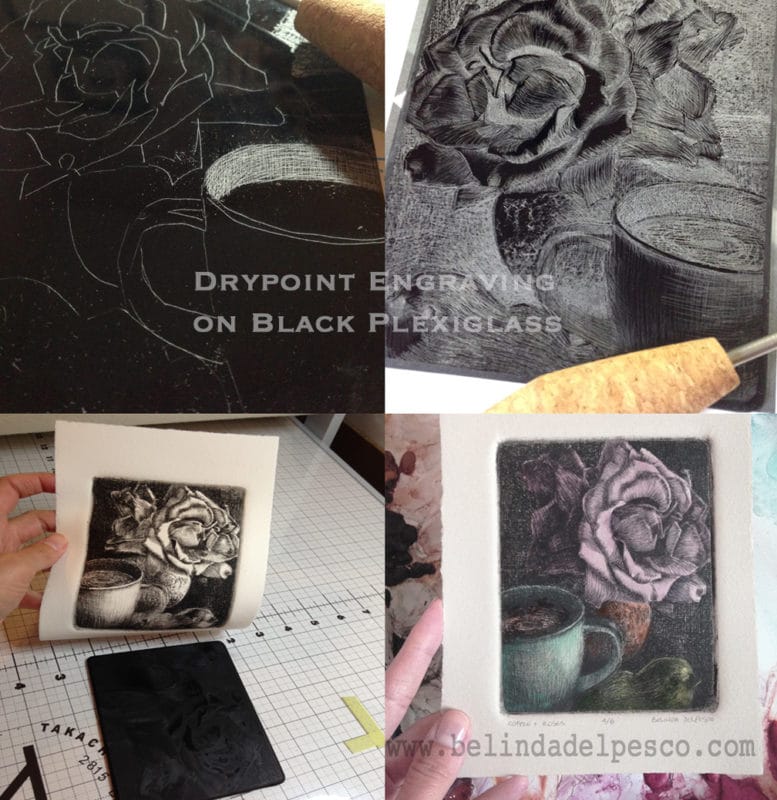
In recent years, I’ve done drypoint etchings and engravings on clear plexiglass plates. The line work can be hard to see while drawing into the plastic with the scribe or needle.
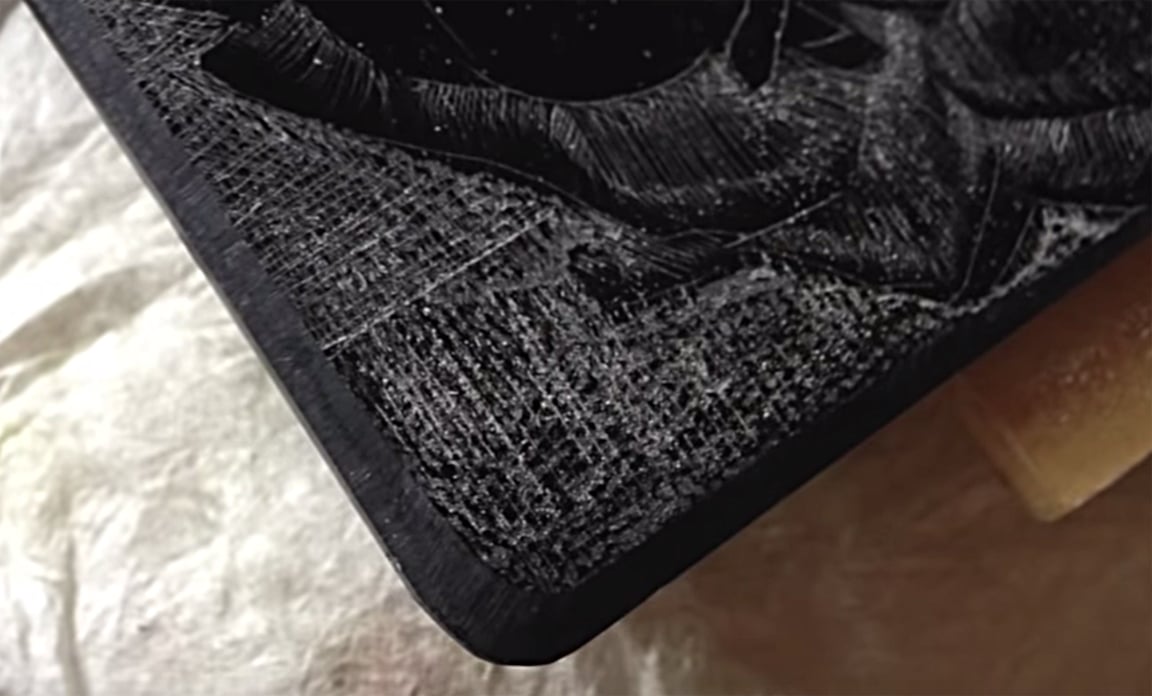
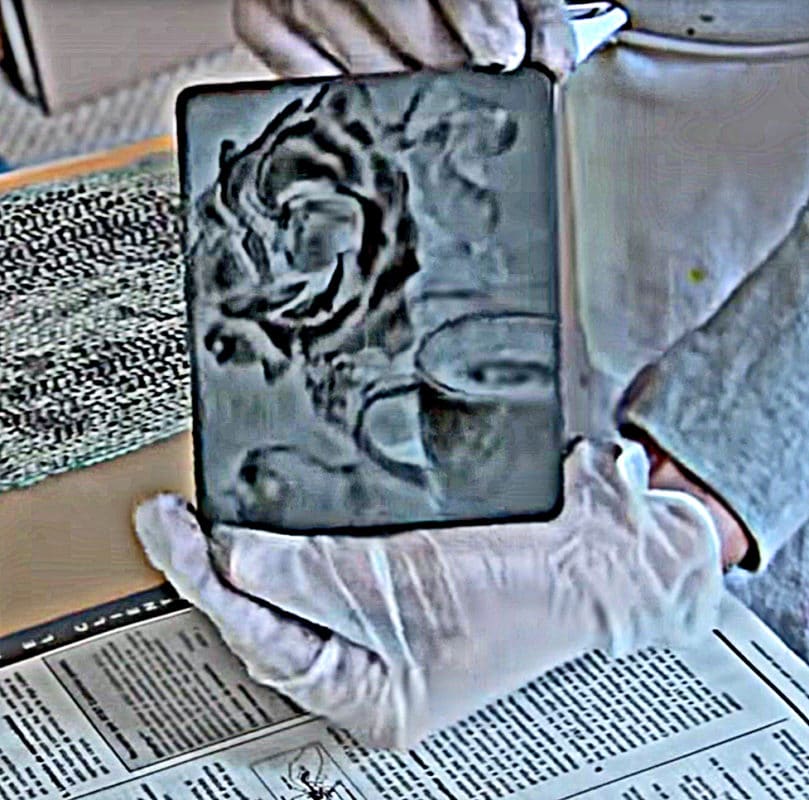
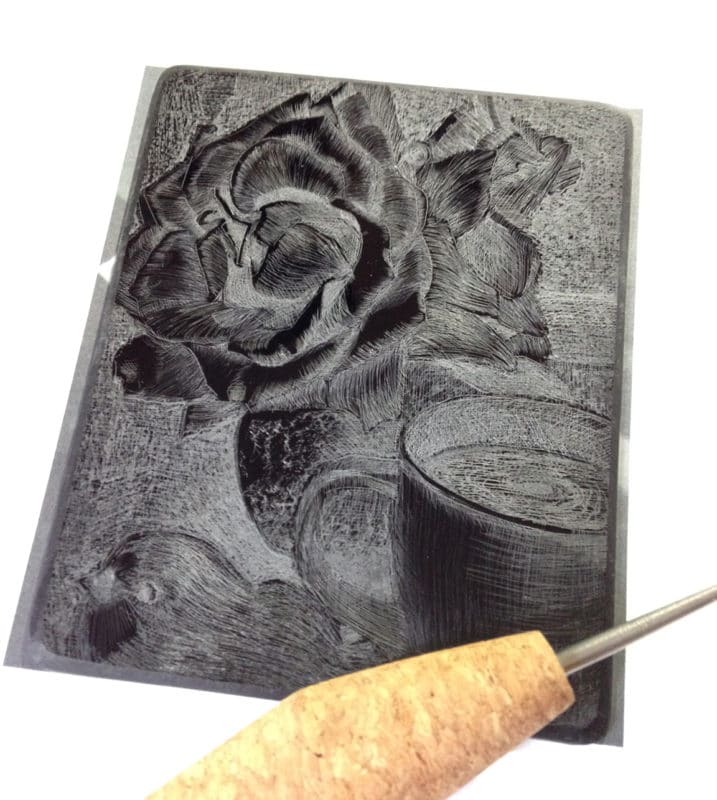
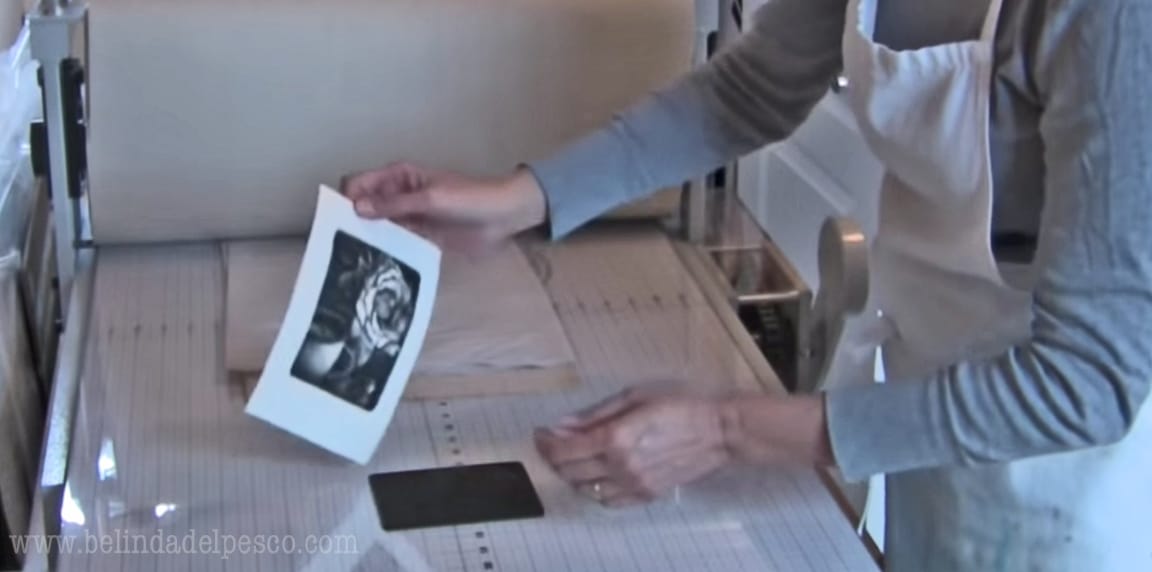
I bought a sheet of opaque black plexiglass on amazon to see if my mark-making would be more evident on the darker acrylic. I scored and snapped the sheet into several pieces to make multiple prints (see that in the video below). It worked!
Drypoint Printmaking on Inexpensive Plexiglass
You can see how to prepare the plate, and make a drypoint print from this inexpensive plexiglass plate in the video tutorial below. All the supplies are listed at the bottom of the post.
There are lots of other watercolor and printmaking experiments on my youtube channel.
Links to Learn More About Drypoint Printmaking
- This post covers drypoint printmaking made from drafting film, or mylar.
- Here is a 3.5 minute overview of a figurative drypoint from a sheet of clear plexiglass.
- Wendy Thompson writes about drypoint printmaking from the Department of Drawings and Prints at the Metropolitan Museum of Art.
- Catherine Brooks from Crown Point Press published a drypoint video excerpt from a DVD on printmaking. This video segment on drypoint uses traditional copper plates, but it’s a great visual on the drypoint printmaking process.
Drypoint Printmaking Tools
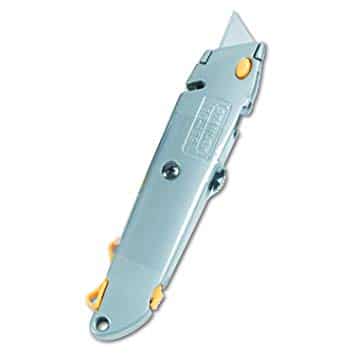
If your hands have trouble with gripping narrow tools, or repetitive movements cause pain, you can incise the lines on your plate with an electric Dremel engraving tool like this one.
No Press? No Problem!
Here is an intriguing post by artist Annie Day in Australia, using the pressure in a small, inexpensive die cutting machine to print her drypoints, etchings, linocuts and collagraphs. Check it out here.
Have a look at this post about small printing press alternatives that include pasta makers and embossing machines.

Drypoint Printing for Beginners
There are some workarounds to needing a press for printmaking methods. It’s pretty easy to transfer a relief or block print by hand. Intaglio prints, where you are printing from the recessed area of the plate, is a little tougher.
Hand transfer of drypoint engravings, etchings and intaglio style prints is a lot of work, and a bit fickle in nature. It can be done, but it might be so challenging for beginners that they lose interest.
We all need successes in the studio to stay curious about a new art-endeavor, so be sure to explore the alternatives in the links above, and the archives of this site. Have a look at the process photos, watch the tutorial videos, read about inks and press alternatives, and then give it a try.
Thanks for stopping by today, and I’ll see you in the next post!
Belinda
P.S. You can subscribe (its free) to get each of these posts as an email here.
P.P.S. Thank you very much for all the patronage during the sale in my Etsy Shop this week. It was lovely to “meet” so many new collectors! Your encouragement and purchases keep this blog endeavor running, and I’m very grateful to each and every one of you. ❌⭕️
Art Quote
Surely something wonderful is sheltered inside you.
I say this with all confidence, because I happen to believe we are all walking repositories of buried treasure.
I believe this is one of the oldest and most generous tricks the universe plays on us human beings, both for its own amusement and for ours: The universe buries strange jewels deep within us all, and then stands back to see if we can find them.
The hunt to uncover those jewels – that’s creative living.
The courage to go on that hunt in the first place – that’s what separates a mundane existence from a more enchanted one.
Elizabeth Gilbert
Drypoint on Plexiglass or Recycled Plastic Printmaking Supplies
Here is a list of supplies to help you prepare to make a drypoint print from plexiglass, drafting film (mylar), or recycled plastic.
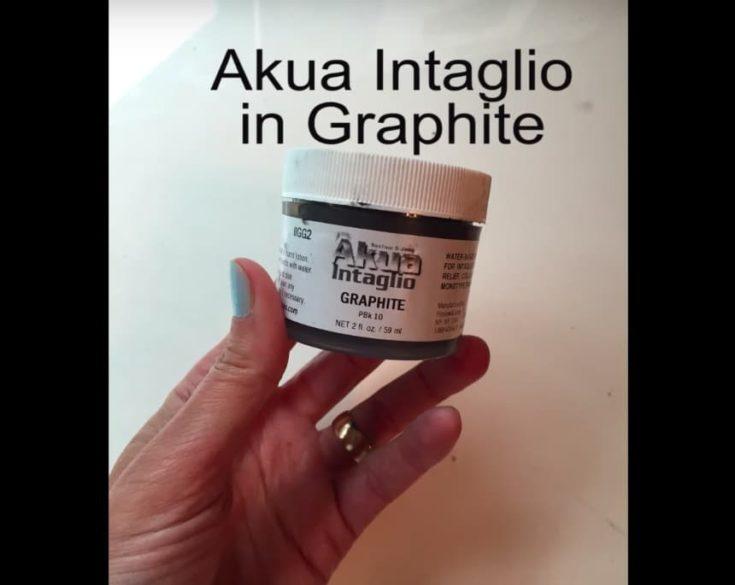
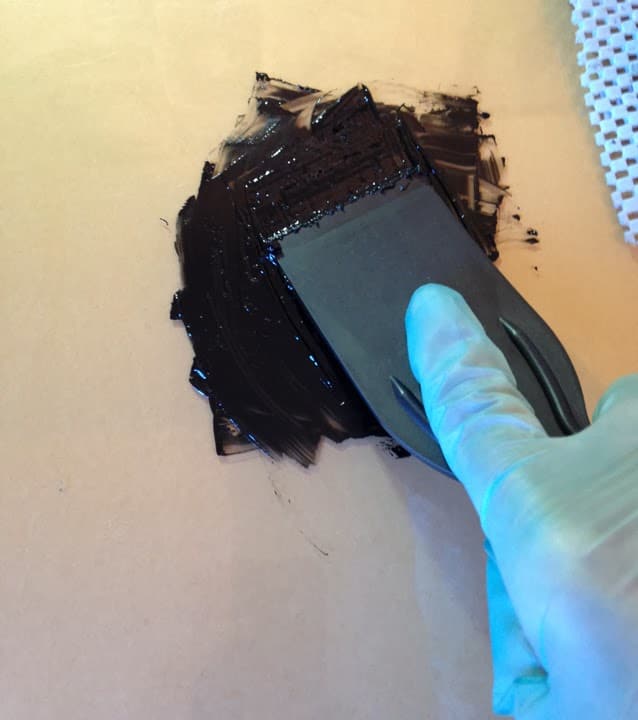
This is the ink I use in my studio when I want to clean things up with soap and water. There's no need for solvents to clean your plates and tools with this ink. Carbon Black intaglio ink is a nice, rich black for great line work. And you can use watercolor on the print after the ink dries – it will not re-wet!
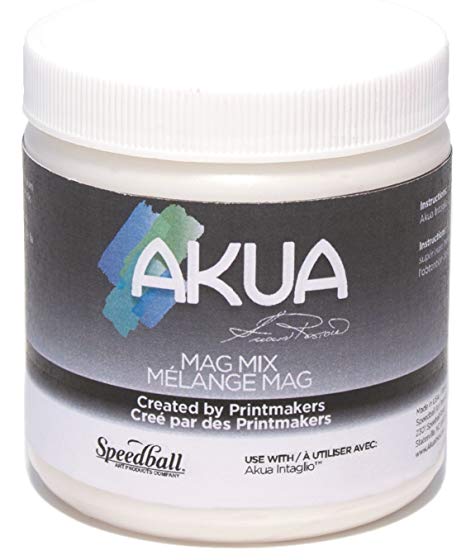
This is a thickening agent to mix with Akua Intaglio Inks. If the ink on your plate wipes out of the grooves and incised lines you've engraved with the needle, it might help to thicken the ink. Mag Mix adds a little more "sticky" to the ink. The pigments stay embedded in your line work a bit better with this ink modifier. You can see how I use it in many of the intaglio and drypoint tutorial videos on my youtube channel.
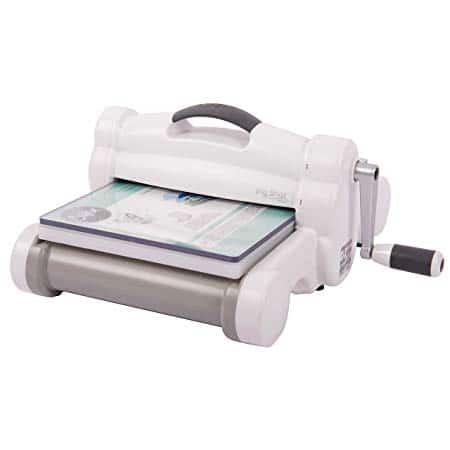
Sizzix Big Shot Plus Embossing Machine (small printing press alternative)
This is an example of the embossing machine artists and printmakers are using to print lovely, small scale drypoint and intaglio prints, as well as linocut prints. Be sure to visit the Facebook group called Craft Press Printmakers. They are doing amazing things with small die cutter and stenciling machines transformed into small printing presses.
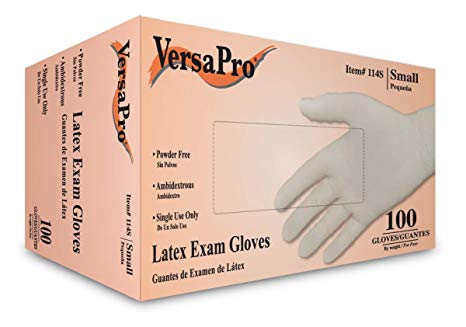
There should always be a barrier between your skin and pigments. Wear rubber gloves (be sure to select the right size) when you mix ink, apply ink to the plate, wipe ink from the plate, and clean the ink up after you're finished printing.
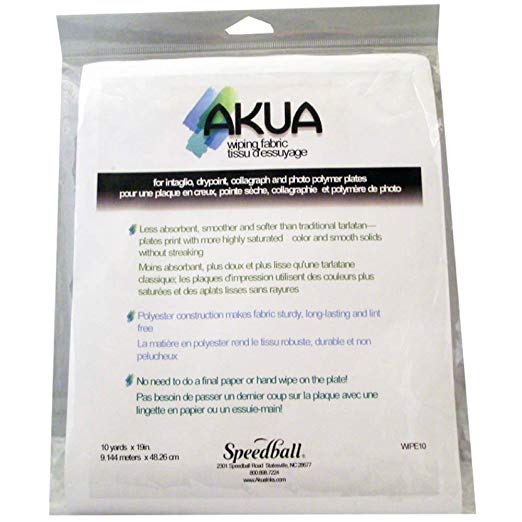
This is starched cheese cloth, or open-weave muslin fabric – also known as tarlatan. It's used to wipe ink from the uppermost surface of your intaglio drypoint or etching plate.
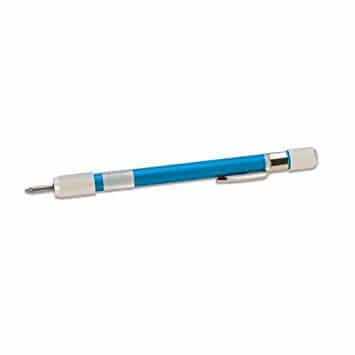
The tip of this scribing pen will carve a narrow groove into plexiglass or recycled plastic.
This is the tool I use to pull ink from containers, and manipulate it on the slab to mix colors, or warm it up with the friction of smooshing and smearing before adding it to the plate. It's also used for scraping leftover ink together, and scooping it into little containers to use in later projects.
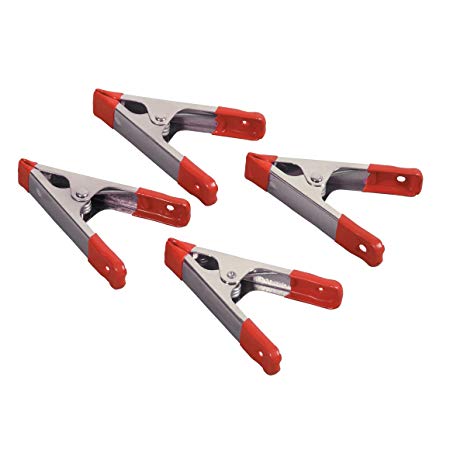
These spring clamps will hold your plexiglass plate steady while you score and snap it into smaller sheets. They also work perfectly for securing the plate without marring the surface while you bevel it, which you can see in a video tutorial on my YouTube channel.

This material works very well to hold your plate steady while you engrave your lines, or add cross hatching with the needle. It also works to steady any printmaking plate while you apply ink, wipe the plate, and clean it after you're finished printing. You can see it used throughout the relief and intaglio videos on my blog and on my youtube channel.
Utility Knife to score and snap your plexiglass material to the appropriate plate size
When your plexiglass arrives, you'll want to score and snap the sheet into smaller pieces to make multiple plates. This is a great tool for that process.

This 12 x 12 plate of opaque black plexiglass can be scored and snapped into smaller plates. Create four 6×6 plates from this sheet. See how to score and snap the plexiglass in the videos that are linked in this post.
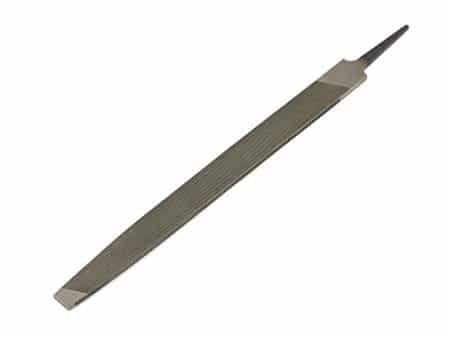
This 8 inch rasp can be used to file the sharp edge of the plexiglass plate down to a 45 degree bevel. This is an important step to prepare the plate before you begin your design, if you plan to print on a press. One rasp will last you a lifetime.
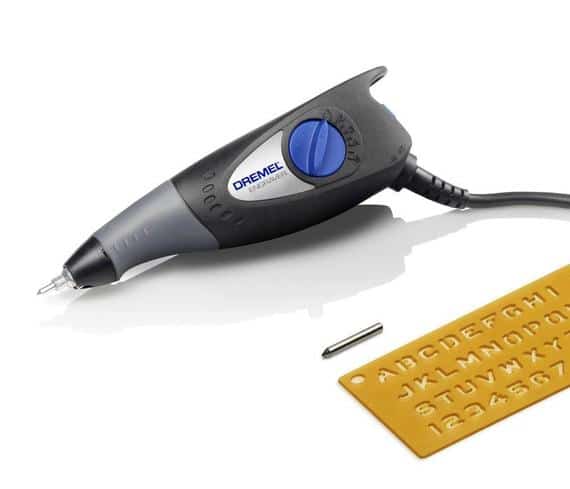
If your hands get tired when doing repetitive motions like cross hatching, or pressing hard on narrow tools to incise lines in plexiglass, you can etch your plexiglass plate with this small electric Dremel.
I love this page!
…I forgot to say… I also use a laundry wringer for larger pieces of paper than A4 that won’t fit in the die-cut embosser. I had to change it: distance the rollers from each other and build a simple device to feed through the laundry wringer. In all honesty I haven’t got it to work as well as the embossing machine yet, but I hope I will be able one day to emboss A3 size !
Wow that was fascinating and informative. I’d only just started engraving into plexiglass so it’s great to get the confirmation that it’ll work. Sheets of plexiglass new is a hell of a lot cheaper than tiny copper plates. And it’s even better if you can recycle stuff you find on the street. Also – I use an A4 die-cut embosser and the results are fantastic, at least with the zinc plate I tried… I use the embosser for almost everything (particularly to press self-made embossing folders which print 3-D images onto moistened paper). …and I’ve also been using a dremel tool for years! I’ve got about 6 of them now around the house in varying sizes and hundreds of different heads which produce different textures. Thanks again for the fascinating post. P.S. I want to work out how to make my own ink for drypoint etching because it is so expensive and comes in such small containers. No success because if I can get the paint thick enough it won’t go into the grooves.
Hi, I started experimenting with drypoint printing using plexiglass on an Access to Art course at college. I’d just like to say that instead of buying black plexiglass, I use clear plexiglass and once I have transferred the outline (which can be a little challenging), I place the clear plate on a piece of black paper or card and then add all my details and shading freehand.
And I think your prints are awesome!
Thanks for the tips. First drypoint, using pin press complete!
Hi Anne! You did? That’s so cool! And did you like the pin press? So many folks have asked about it…. Yayyy!
Hi Belinda, this is unbelievably interesting and I would love to try it sometime when my fingers lose some of the swelling from arthritis and after I gather most the material from Amazon, of course. It is so easy to get fired up but another thing to stick with it, right! I am so grateful for all your knowledge and how you so tirdlessly pass it on to us the other artists Belinda. Best wishes, Steinunn
Hi Steinunn, I’m glad you’re interested in trying drypoint! If you do gather the supplies to give it a go, you might consider buying a small dremel engraver ( https://amzn.to/36cpfpq ) to save your hands from the strain of incising lines and crosshatching. A sharp point on the engraver will allow you to draw into the material much faster, and with less pressing from your hands. Either way, have fun playing with your art supplies, and thanks so much for the kind compliments.
Wonderful information, thank you.
I think now that I’ll try this method for holiday cards.
Hi Maywyn, I hope you have fun making them!
Black plexi is a great idea! I guess I didn’t even know it existed. :0
Yes, hun, plexiglass comes in all sorts of colors! It’s hard to resist thinking up a million other projects to make with it. But I reign myself in… xo ?
Beautiful example. I love the way you can see your lines while engraving. Would it also work to just paint black acrylic on the back of clear plexi, or tape a piece of black paper to the back while scribing?
Hi Kathleen, Thanks for your compliments… I think it’s easier to just lay the plexi on a dark sheet of paper or mat board. No tape necessary. You can see how that looks in this video: https://youtu.be/5GWAHsL7Yvw I think painting the plate with acrylic would result in a plate shedding paint tendrils because the surface is so slippery, but that’s what makes it work so well for an intaglio print. Much of this will depend on the artist’s eye sight. Mine is hampered for all things close up, so I needed all the help I could get. ?
@John, Thanks for the nice note. If you try using the black plexi, post it to your blog so we can see! 🙂
I love the idea of using black so you can see the detail so much better.
@Sue, thanks for the compliment!
AHHH…How pretty!
I thought at first a good idea black plexiglass but how do you tell where the tonal range is when you wipe the plate?
I printed this edition with traditional intaglio ink, and the pigment (black) was clearly visible on the plexiglass when the plate was tilted to catch light. I could see clearly as I was wiping where I had more or less ink, and it was not a problem to wipe the ink with the same tonal control intention that I’d use on a clear plexi or a copper plate.